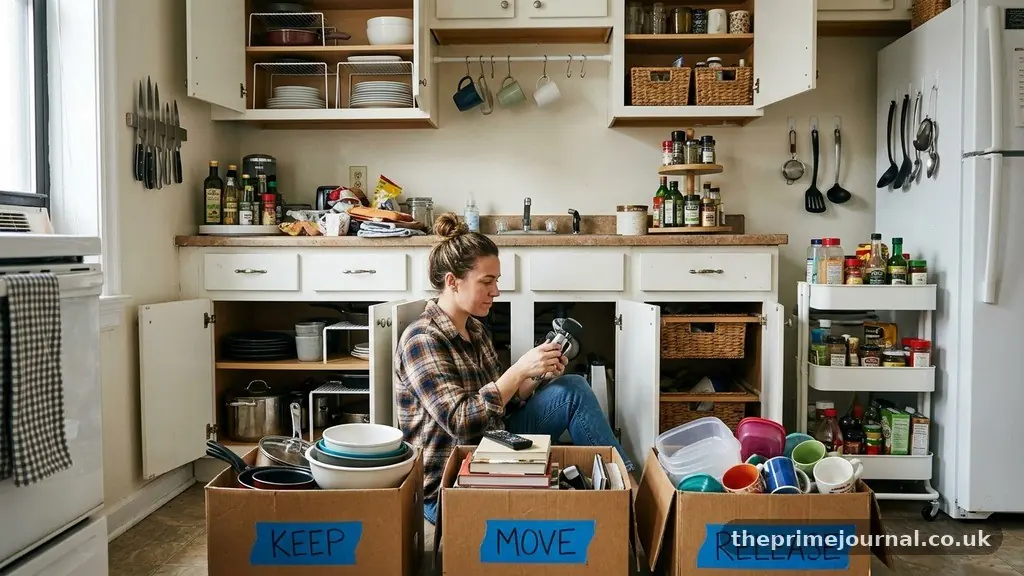
Smart Ways to Organise a Small Kitchen Without Renovation starts with changing how each centimetre works, not replacing cabinets or moving walls. A few well-placed organisers, better vertical storage, and a ruthless look at what actually earns space can make cooking feel calmer within a weekend.
The biggest gains usually come from removing duplicates, keeping daily tools within easy reach, and giving awkward corners a clear job. You’ll find practical ways to improve cupboards, drawers, worktops, and the area beneath the sink using removable or budget-friendly solutions that won’t damage your home.
Start With the Highest-Impact Changes
The fastest answer is to combine decluttering, vertical storage, and compartmentalised storage before buying anything. These three changes address the most common small-kitchen problems: too many rarely used items, wasted air above shelves, and loose objects consuming usable space.
Begin by emptying one cupboard, drawer, or shelf at a time rather than pulling everything into the middle of the room. Group similar items on the counter, then keep only what you use, what you genuinely need for occasional tasks, and what has a clear sentimental or practical reason to stay.
Duplicates are often the easiest decisions. If you own four wooden spoons but reach for the same two, keep the favourites in the active kitchen and move the others elsewhere or donate them.
Next, move infrequently used equipment out of prime real estate. A roasting pan, ice-cream maker, or large serving platter may be useful, but it doesn’t need to occupy the cupboard beside the hob if you use it only a few times a year.
Use a simple priority system for every item:
- Daily: keep it in the easiest-to-reach drawer, cupboard, or open shelf.
- Weekly: place it nearby but slightly higher, lower, or farther back.
- Occasional: store it in a high cupboard, under-bed container, utility area, or another suitable room.
- Uncertain: put it in a labelled trial box and review it after 30 days.
This approach prevents a common mistake: buying storage products for objects you shouldn’t be storing. A narrow kitchen becomes more functional when every remaining item has a predictable home.
Before measuring for cabinet organisers, take photographs of the empty spaces and note their width, depth, and height. Measurements matter because a shelf that is only a few centimetres too wide can make a cupboard door impossible to close.
The most useful first purchases are usually modest. Consider one drawer-divider set, a small lazy Susan turntable for bottles, shelf risers for plates or tins, and one vertical rack for chopping boards or baking trays.
Don’t try to transform the whole kitchen in one afternoon. Finish one zone, use it for a few days, and let your habits reveal what needs adjusting.
Declutter by Task, Not by Object
Small kitchen organisation works better when items are grouped around activities rather than scattered according to their shape. A baking zone might contain measuring cups, scales, flour, parchment, and mixing tools, while a breakfast zone could hold coffee, mugs, tea, and cereal bowls.
This task-based approach reduces movement. If the coffee supplies sit in three different cupboards, making one drink creates unnecessary searching and repeated opening and closing.
Pull everything from the area you want to reorganise, then ask four practical questions: Do I use it? Is it safe and in good condition?
Does another item perform the same job? Would I look for it here while cooking?
The final question is especially helpful. A set of cocktail glasses may be perfectly good, yet storing it beside everyday drinking glasses may crowd the shelf you rely on several times a day.
Make an honest keep, move, and release decision
Create three groups: keep here, keep elsewhere, and release. “Keep elsewhere” is not a disguised way to avoid decluttering; it is useful for equipment that belongs in a dining room, utility cupboard, pantry, or seasonal storage area.
Check condition as you sort. Chipped mugs, warped plastic containers, blunt peelers, and lids without matching bases take up space while making daily work harder.
Food containers deserve their own review. Match each lid to a base, recycle or discard the unmatched pieces according to local rules, and choose a consistent shape where possible because stackable containers use shelves more efficiently than a collection of unrelated forms.
Keep a small amount of open space in every active zone. A shelf filled to the edge may appear efficient, but it forces you to remove several items before reaching the one at the back.
Paper clutter is another quiet source of kitchen mess. Store takeaway menus, appliance manuals, recipes, and coupons in a single labelled folder rather than allowing them to spread across the refrigerator and worktops.
Move rarely used serving pieces higher up, but make sure they remain safely accessible. If retrieving a heavy dish requires standing on a chair, choose a lower location or use a stable step stool designed for household use.
Use a short holding period for difficult items
Some possessions are hard to release because they represent a possible future use. Put those objects in a clearly labelled box with a review date, then notice whether you actually search for them during the next month.
This method works particularly well for novelty gadgets. A spiraliser, sandwich press, or specialist cake tin may earn its place if you use it regularly, but it shouldn’t receive premium storage merely because it was expensive.
Donate suitable items promptly rather than creating a permanent “maybe” pile. Clean, working kitchen equipment can help someone else, while broken or unsafe items should be handled through the appropriate local waste or recycling service.
Build Upward With Vertical Storage
Most small kitchens have unused space above plates, below cabinet shelves, on the backs of doors, or along a narrow wall. Using those surfaces creates capacity without changing the room’s footprint.
Stackable containers are an easy starting point for dry foods and leftovers. Select containers that nest when empty and stack securely when full, then label the contents if opaque material makes identification difficult.
For safety, place heavier containers on lower shelves and lighter items higher up. A tall stack of glass jars may look tidy, but it is inconvenient and risky if the bottom jar supports more weight than it can comfortably handle.
Shelf risers create a second level inside a wide cupboard. They work well for plates, bowls, cans, and small jars, especially when the cabinet has more height than the stored items require.
Use walls without making the room feel crowded
Wall-mounted shelves can hold spices, mugs, small plants, or attractive everyday dishes. Install them where they won’t interfere with cupboard doors, food preparation, or head movement, and keep the heaviest objects on the strongest fixings.
A magnetic knife strip can free an entire drawer, but it should be mounted securely and positioned away from children’s reach and busy walkways. Place knives with the handles oriented consistently so you can identify and remove one safely.
Pegboard kitchen storage offers flexible space for utensils, pans, scissors, and small baskets. Its advantage is adjustability: hooks can move as your routine changes, unlike a fixed rack that may suit one collection of tools but not another.
Renters should check whether wall mounting is permitted and whether the surface can support the proposed load. Removable adhesive products can work for lightweight objects, but follow the manufacturer’s weight limits and allow the adhesive to bond for the stated time.
Over-the-door organisers are useful for cleaning supplies, foil, wraps, spices, or small packets. Measure the clearance first, because a hanging organiser can prevent the door from closing if it is too deep or if interior shelves sit close to the hinges.
Cabinet-door racks can turn unused inner surfaces into storage for pan lids, chopping boards, or measuring spoons. Keep the contents light enough that the hinges are not strained and confirm that the rack does not collide with shelves or stored food.
Don’t fill every wall with open storage. A few carefully selected shelves usually look calmer than a dense display of packets, appliances, and mismatched containers.
| Storage option | Best for | Check before installing |
|---|---|---|
| Shelf risers | Plates, bowls, tins, and jars | Interior height and shelf depth |
| Magnetic knife strip | Frequently used knives | Wall strength and safe placement |
| Over-the-door organiser | Packets, wraps, spices, and cleaning products | Door clearance and hinge space |
| Pegboard | Utensils, pans, and flexible tool storage | Fixings and load capacity |
Make Cabinets and Drawers Easier to Use
Deep cupboards often look spacious but hide their contents behind a crowded front row. The solution is not always more shelves; it may be better visibility and easier access.
A lazy Susan turntable is effective for oils, vinegars, sauces, and spices that otherwise disappear at the back of a corner cupboard. Choose one with a raised edge so bottles stay in place while the tray rotates.
Group products by use rather than brand. Cooking oils can share one turntable, while baking ingredients belong together in a different container or cupboard zone.
Pull-out shelves are another strong option for deep cabinets, particularly below the worktop. They bring heavy pans, appliances, or food supplies forward instead of requiring you to kneel and reach into a dark space.
Because pull-out shelves are more expensive than a simple bin, reserve them for cabinets that genuinely cause frustration. A basic open basket may solve the same problem for lightweight items.
Give drawers defined jobs
Drawer dividers stop utensils from sliding into one tangled pile. Use adjustable dividers for long tools and small compartments for measuring spoons, peelers, clips, or tea accessories.
Organise the drawer according to frequency. The spatula and tongs used every evening should sit toward the front, while a melon baller or specialist pastry tool can occupy a less convenient section.
Keep knives separate from loose utensils. A fitted knife block inside a drawer protects blades and fingers, provided it fits securely and leaves the drawer easy to open.
Do not overfill drawers in the name of efficiency. If one compartment is packed so tightly that removing a single utensil shifts everything else, reduce the number of tools or create a second location for occasional items.
Vertical dividers inside a lower cabinet can store chopping boards, baking trays, cooling racks, and pan lids on their edges. This arrangement makes each item visible and prevents a flat stack from becoming an unstable pile.
Use containers selectively. Small bins can keep packets together, but too many individual boxes create another layer of maintenance and consume space that loose, grouped items might use more efficiently.
Label only where labels solve a real problem. A label helps in a shared household or for opaque containers, but labelling obvious objects can add visual noise without improving access.
Turn Awkward Areas Into Useful Zones
The space beneath the sink is often difficult because plumbing interrupts the cabinet and cleaning products need separation from food. Under-sink storage becomes more practical when you use a two-level arrangement that leaves the pipes visible and accessible.
Place a shallow pull-out bin or handled caddy on one side for sprays, cloths, and gloves. A second container can hold dishwasher tablets or spare sponges, but keep chemicals in their original packaging and away from food and children.
Leave enough room to inspect the plumbing. A storage system that must be dismantled before you can see a leak is not a successful solution.
The corner beside the refrigerator may fit a slim rolling cart. Use it for baking supplies, bottled drinks, or extra pantry items, then roll it out only when needed.
Measure the narrowest point, including handles, skirting boards, and appliance doors. A cart that fits the gap but blocks the refrigerator or oven will create frustration rather than useful capacity.
Use the refrigerator and cabinet sides carefully
The side of a refrigerator can support a magnetic shopping list, measuring conversion chart, or a small magnetic basket for lightweight packets. Keep heat-sensitive foods away from warm appliance surfaces and avoid loading magnets with heavy glass jars.
The top of a refrigerator is suitable for light, infrequently used items in a closed container. Dust and heat make it a poor location for open food, chocolate, or anything you need several times a day.
Toe-kick drawers can add concealed storage, but they are usually a modification rather than a completely temporary solution. If renovation is off the table, use a low-profile tray or lidded box only where it won’t interfere with ventilation, cleaning, or cabinet doors.
Above-cabinet space can hold serving platters, spare vases, or seasonal equipment inside matching boxes. Choose containers with lids because this area collects dust, and avoid storing anything heavy enough to injure someone if it falls.
A narrow wall beside a doorway may accommodate a shallow shelf for cookbooks or a rail for utensils. Keep walkways clear and ensure corners don’t project into shoulder or head height.
Even a windowsill can become useful, though it shouldn’t be overloaded. Small herb pots, a soap dispenser, or a compact drying rack may fit, while large appliances can block light and make cleaning the window difficult.
Protect Your Countertop Working Space
Countertop storage solutions should support the way you cook rather than become a permanent parking area for every appliance. Keep only the equipment used several times a week in the open, and store the rest behind a door or on a trolley.
A compact utensil crock near the hob can hold the tools used during cooking. Limit it to the essentials, because a container overflowing with whisks, spatulas, and serving spoons quickly becomes another form of clutter.
Use a wall-mounted paper towel holder, under-cabinet mug hooks, or a slim fruit bowl if these items genuinely need to stay accessible. Choose one solution at a time and see whether it improves the surface before adding another.
Appliance garages made from decorative boxes or baskets can hide a toaster, blender, or coffee equipment when not in use. Leave ventilation space around appliances that produce heat, and unplug them before moving or storing them.
Create a clear preparation lane
Most kitchens benefit from one uninterrupted preparation area, even if it is only part of the worktop. Keep this section free from mail, decorative objects, and appliances that are used only occasionally.
Store chopping boards vertically near the preparation zone. A slim rack can hold boards, baking trays, and cooling racks without consuming the horizontal surface needed for chopping.
Place everyday ingredients near their point of use. Salt, pepper, oil, and the most-used utensils can sit in a small tray beside the hob, while bulk supplies remain in a cupboard to keep the counter visually lighter.
A tray creates boundaries for items that must remain out. If you need to clear the worktop for baking or cleaning, you can move the entire group at once instead of handling several separate objects.
Keep food safety in mind when arranging open storage. The USDA’s refrigeration and food-safety guidance explains why perishable foods need prompt chilling and why storage temperature matters.
Do not store raw-food preparation tools beside ready-to-eat items without cleaning them properly. Organisation should make safe habits easier, not simply make the room look tidy.
Choose Storage Products That Earn Their Space
Storage products are useful only when they improve access, visibility, or capacity. Before buying, identify the exact problem: a deep shelf, loose packets, crowded utensils, unused wall height, or a lack of space beside an appliance.
Measure the storage area twice. Record width at the front and back, depth with the door closed, and height beneath hinges, plumbing, or shelves.
Prioritise products that can serve more than one purpose. A handled basket can hold pantry packets, cleaning cloths, or small appliances, while an adjustable divider can be repositioned as your collection changes.
Transparent bins help you see contents, but clear plastic is not automatically best. Open baskets offer quicker access for daily items, whereas lidded containers protect occasional or dusty storage.
Choose materials that suit the location. Metal racks cope well with dry pans and baking trays, washable plastic suits under-sink areas, and bamboo or wood can work for dry drawers if moisture is controlled.
Don’t buy a complete matching set merely for appearance. One well-sized organiser can solve a problem more effectively than six smaller products that leave awkward gaps.
Use this simple buying test
- Will the item make a frequently used object easier to reach?
- Does it fit the measured space with clearance for doors and drawers?
- Can it be cleaned without special treatment?
- Will it still work if your household routine changes?
- Does it reduce clutter, or simply give clutter a nicer container?
Try temporary solutions before committing. Cardboard boxes, spare trays, and inexpensive baskets can reveal whether a proposed arrangement suits your habits.
Give each new product a short trial period. If you repeatedly remove it to reach something else, return it, reposition it, or choose a simpler option.
Budget-friendly organisation often comes from repurposing what you already own. A sturdy file holder can store chopping boards, a small tray can corral oils, and a mug tree can hold measuring cups if the base is stable.
Make sure repurposed items are easy to clean and safe for their new use. Avoid putting food directly into containers that previously held chemicals, and don’t use unstable decorative objects for heavy cookware.
Keep the System Working
Even the best layout will collapse if objects don’t return to their assigned homes. The aim is not constant tidying; it is making the correct action easier than leaving something on the counter.
Store items close to where they are used. Keep mugs near the kettle, pans near the hob, and food containers near the area where leftovers are packed.
Use a five-minute reset at the end of the day. Put away stray utensils, wipe the main worktop, return ingredients to their zones, and check whether rubbish or recycling needs attention.
Once a month, review one small area rather than the entire kitchen. A single drawer can reveal duplicates, broken tools, or products that migrated from their intended homes.
Shared kitchens need visible rules. Labels, open baskets, and clear zones help other household members put things away without asking where every item belongs.
Leave some flexibility for real life. A kitchen may need temporary space for a birthday cake, a large grocery delivery, or a slow cooker in use, so don’t design every surface with zero spare capacity.
When an arrangement fails, treat it as information rather than a personal failure. Perhaps the container is too deep, the drawer is too far away, or the item is used more often than you originally thought.
Take a quick photograph when the kitchen is working well. It can serve as a reset reference after busy weekends, celebrations, or a major grocery shop.
Frequently Asked Questions
What should I organise first in a small kitchen?
Start with the cupboard, drawer, or worktop you use most often. Remove duplicates, discard damaged items, and group the remaining tools by task before purchasing organisers.
How can I add storage without drilling into walls?
Try shelf risers, freestanding racks, tension rods, handled baskets, over-the-door organisers, and a narrow rolling cart. For adhesive hooks or strips, follow the product’s weight and surface instructions rather than assuming they will hold heavy cookware.
Is open shelving a good idea for a small kitchen?
Open shelving can improve access and make a narrow room feel less enclosed, but it works best for a limited selection of attractive, frequently used items. Store dusty, messy, or rarely used supplies behind doors or in lidded containers.
How do I organise a deep corner cupboard?
Use a lazy Susan turntable for bottles and jars, or install a pull-out shelf if the cabinet holds heavier cookware. Keep similar items together and avoid stacking so high that the contents become difficult to see.
How often should I declutter kitchen storage?
A quick monthly check is enough for most households, with a deeper review every few months. Reassess sooner after changing your cooking habits, buying a new appliance, or noticing that a drawer no longer closes easily.
Make the Kitchen Feel Bigger Without Changing It
Smart Ways to Organise a Small Kitchen Without Renovation is mostly about making decisions visible: daily tools near the action, occasional items out of prime space, and every cupboard arranged for easy reach. Begin with one high-use zone, add vertical storage where it genuinely helps, and test products before spending more.
A clear preparation surface, sensible cabinet organisers, and a five-minute reset can change the room’s rhythm surprisingly quickly. Give each item a home that matches real behaviour, then adjust the system as your routines evolve and share what works in your kitchen.